It is common to want to assign a unit price to an estimation tool. For instance, let’s say Tile 4 costs $1.99 per square foot. We'll use custom columns in the Markups list to assign a price to Tile 4, and Revu will automatically calculate how much the tiling will cost. The most efficient way to use this feature is to set the price before creating takeoffs, so each markup already has the correct value assigned. However it is possible to fill the prices in later, or change them at any time. Custom columns can be created and assigned for any tool in the Tool Chest, including those provided with Revu.
- Open the Markups List.
-
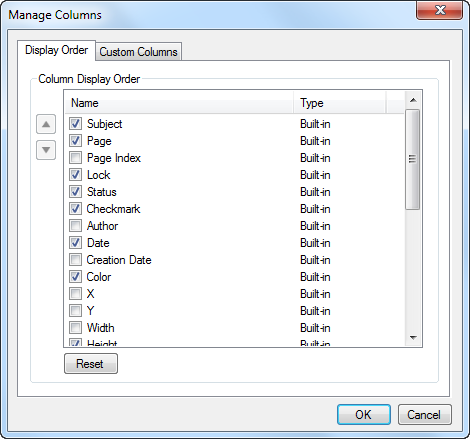
Click  Manage Columns on the Markups list toolbar. The Manage Columns dialog box appears.
-
Select the Custom Columns tab and click Add. The Add Column dialog box appears.

- The first column we will create will be to track the unit price of our materials. Enter a Name (for example, “Unit Price”).
- From the Type list, select Number.
-
From the Format list, select Currency. It should look something like this:

- Click OK.
- Click Add again.
- The second column we will create will be to calculate the estimated cost of materials. Enter a Name (for example, “Estimate”).
- From the Type list, select Formula.
-
We are going to define the formula for calculating our estimation as the area of the measurement times the price per unit. In the Expression field, start entering the name of the first Variable of your formula (in this case, we are starting with Area). When you start typing, a list appears with possible variables and the one that most closely matches what you have entered is selected by default. Select the Area variable.

-
Next to the first variable, enter the desired Operator. For this example, we are multiplying, so we will enter * (the asterisk).
The valid operators are:
- Addition (+)
- Subtraction (-)
- Multiplication (*)
- Division (/)
- Exponential (^)
- Modulus (%)
- Negation (-)
- Next to the Operator, enter the second Variable the same way you entered the first. Because we created the price capturing column first ("Unit Price"), it is listed as an available variable, so select it.
-
From the Format list, select Currency. It should look something like this:

- Click OK. The Add Column dialog box closes.
- The custom columns that we have created will only appear on the PDF that is currently active by default. If that is acceptable, click OK again and the Manage Columns dialog box closes.
- If you would like to make these custom columns a part of the current Profile so that they are available in future PDFs, click Save to Profile first.
- On the Markups list toolbar, click Columns and check the custom columns you just created (for example, Unit Price and Estimate) so they appear in the Markups list.
- Select the Tool Chest tab and, in the Estimation tools tool set, click the T4 tool that we made earlier.
- Select the Properties tab. Because there are custom columns available on this PDF, there is a Custom section available where we can input values for this tool. If necessary, click its toggle triangle next to open the section.
-
In the Unit Price box, enter the price per unit for the material (for example, "1.99").

- The price is now set. All that's left to do is to create a takeoff using the Tile 4 tool.
In the Markups list, you should now see the Unit Price reported as $1.99 and the Estimate reported as the product of the square footage you measured times $1.99.
As you continue to make takeoffs, you will notice there is a running subtotal organized by whatever column is currently sorting. To change what is being subtotaled, simply sort by the desired column.


