This article applies to:
- Revu 21
- Revu 20
- Revu 2019
- Revu 2018
When backing up your Revu settings and/or transferring your copy of Revu to a new computer, digital IDs aren’t included in your back-up files. In this article, we’ll go over how to export and import your digital IDs to a new computer.
Locate where your digital ID is saved
In Revu, your digital ID is either created as a .pfx file or in the Windows Certificate Store. To check the save format and location of your digital ID:
- Open
 Revu.
Revu. - Go to Tools > Signature > Digital IDs…
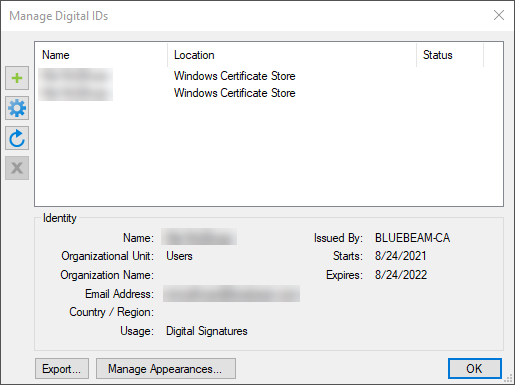
- In the Manage Digital IDs dialog box, select your digital ID / signature.
- The Location column will tell you where the digital ID has been saved. Hover your cursor over the digital ID to see the full file path.
- Navigate to the location via the File Explorer.
To access the hidden AppData folder, switch from the Home tab to View in the File Explorer dialog box and select the Hidden items checkbox. - Copy the .pfx file of your digital ID and save it in the same location on your new computer.
Now your digital ID has been successfully transferred. However, it doesn’t automatically load into Revu and will need to be imported before you can access it.
Microsoft Certificate Manager digital IDs
Some organizations configure digital IDs via the Windows Certificate Store.

If your digital ID is located in the Windows Certificate Store, you’ll need to export the .pfx file using the Microsoft Certificate Manager (MCM).
Import an existing digital ID on a new computer
After retrieving and saving the .pfx file associated with your digital ID to a new computer, you’ll need to import it into Revu to access it for digital signatures. To do this:
- Open
 Revu on your new computer.
 - Go to Tools > Signature > Digital IDs…
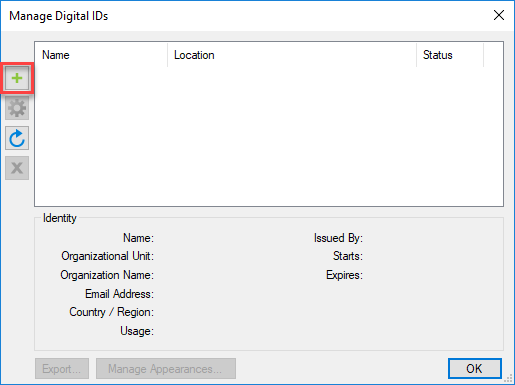
- In the Manage Digital IDs dialog box, click the + to add a digital ID.

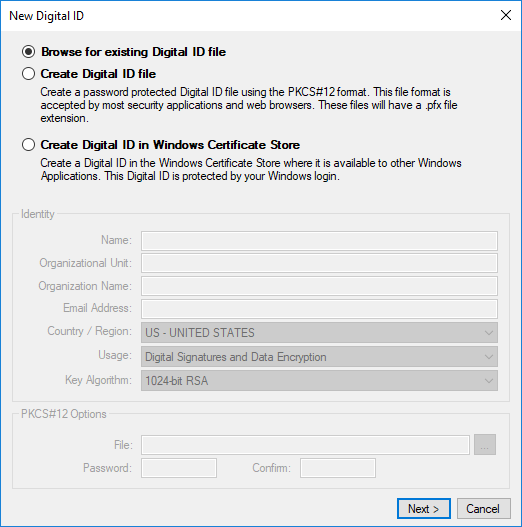
- In the the New Digital ID dialog box, select Browse for existing Digital ID file.

- Select Next.
- In the File Explorer, navigate to where you saved your .pfx file(s) and select Open.
- If the .pfx file has a private key, enter the password when prompted and select OK.
Now your digital ID(s) can be accessed from Revu on your new computer. To learn more about creating and managing digital signatures in Revu, click here.
How-To
Revu 21
Revu 20
Revu 2019
Revu 2018
Revu 2017 & Below
PDF Management
Document Processing
